Introducing AWS Cloud9
Until now, we have been using VSCode IDE on our local machine. While this allows for a faster and easier setup, there are some drawbacks. For instance, we have to set up AWS access keys and secrets. Now imagine in a collaborative environment, we will need each team member to set up AWS credentials which may not be ideal. As an alternative, we can use AWS Cloud9.
What is AWS Cloud9
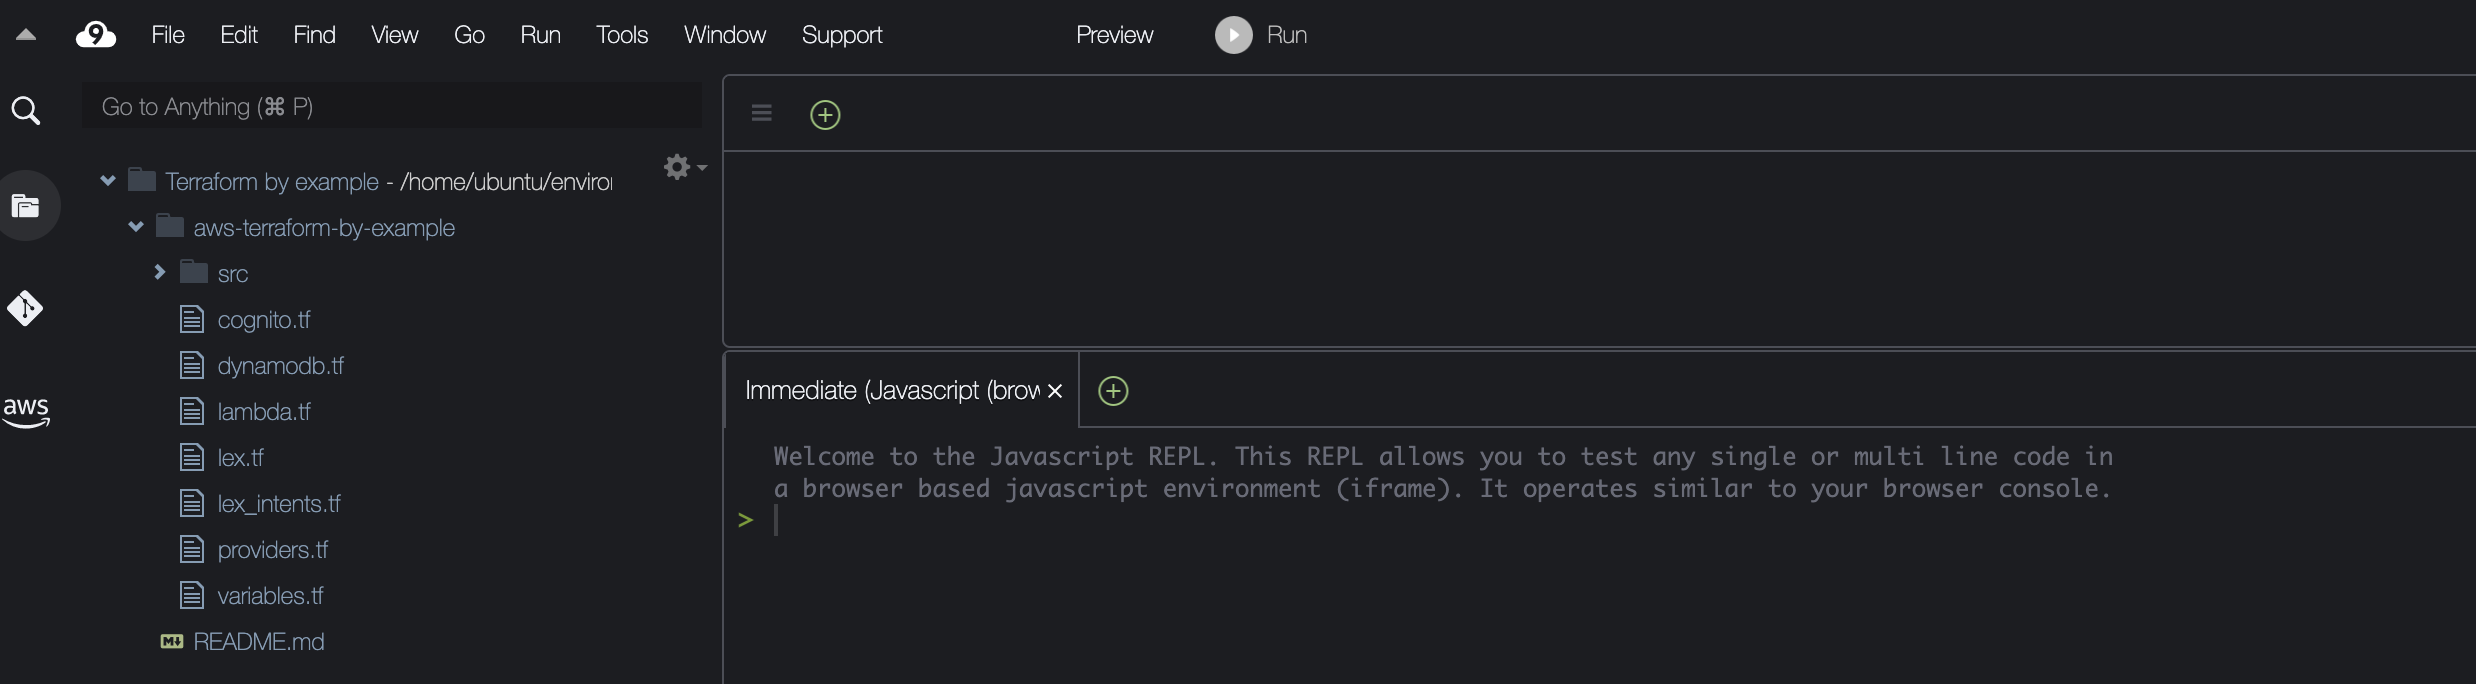
AWS Cloud9 is a cloud-based integrated development environment (IDE) that allows you to write, run and debug code via the browser. Like VSCode, it encompasses a code editor, debugger, and terminal. You can work on your project from anywhere, as long as you have a machine connected to the internet. In addition, sharing development environments and code pairing with team members is a breeze.
Also, AWS Cloud9 comes with a terminal that includes sudo privileges to the managed Amazon EC2 instance hosting your development environment and a preauthenticated AWS Command Line Interface. This makes it easy for you to run commands quickly and directly access AWS services.
Cloud9 Setup
Create environment
- Navigate to your AWS console and search for Cloud9
- Click on the Create environment button
- Provide a name for your environment
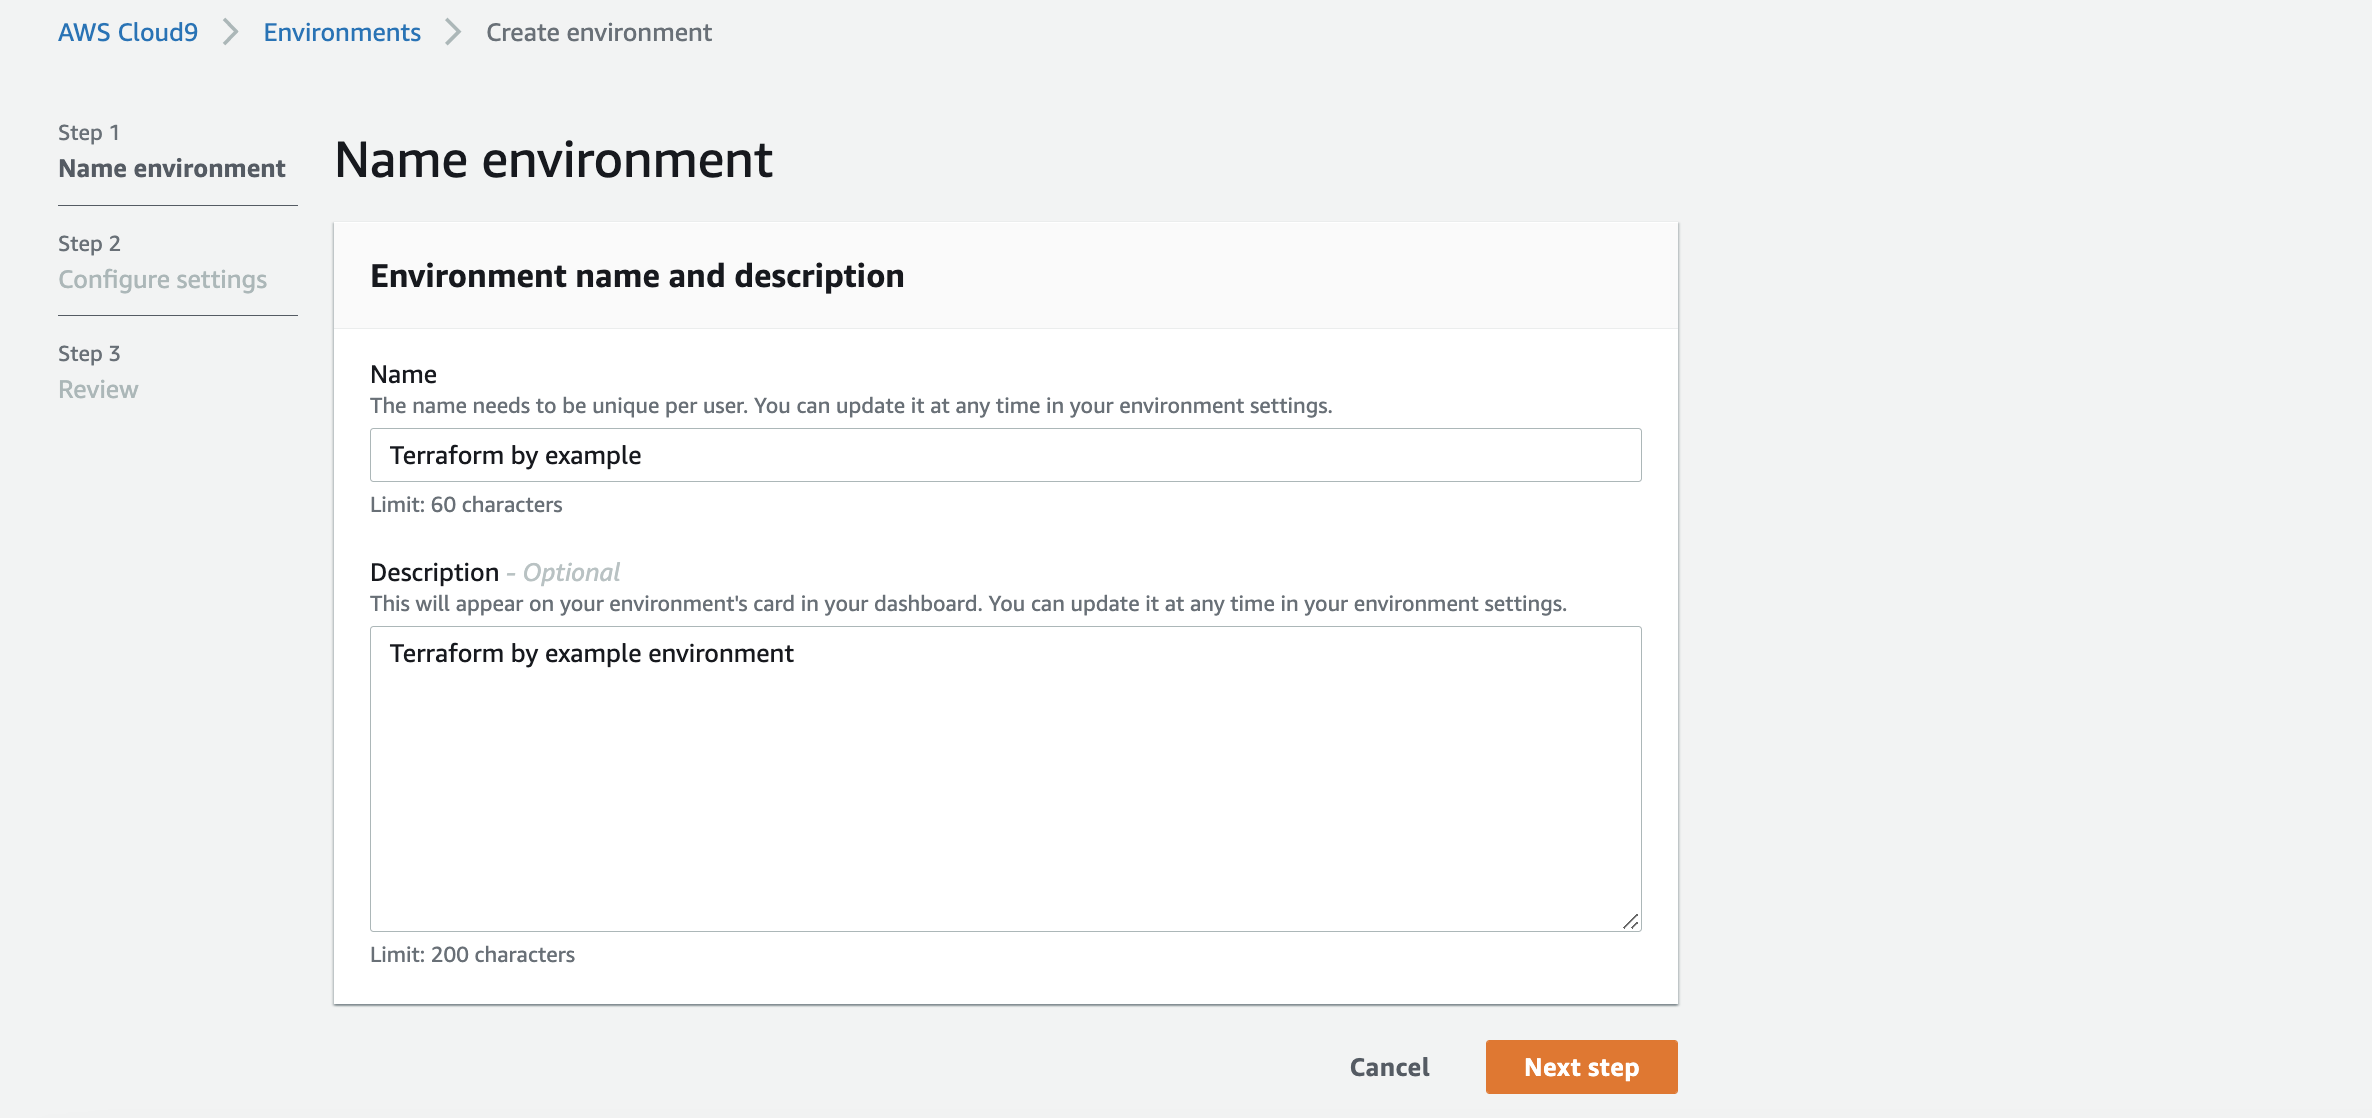
- Click next and make sure to select at least the following settings just to make sure we work with the same settings
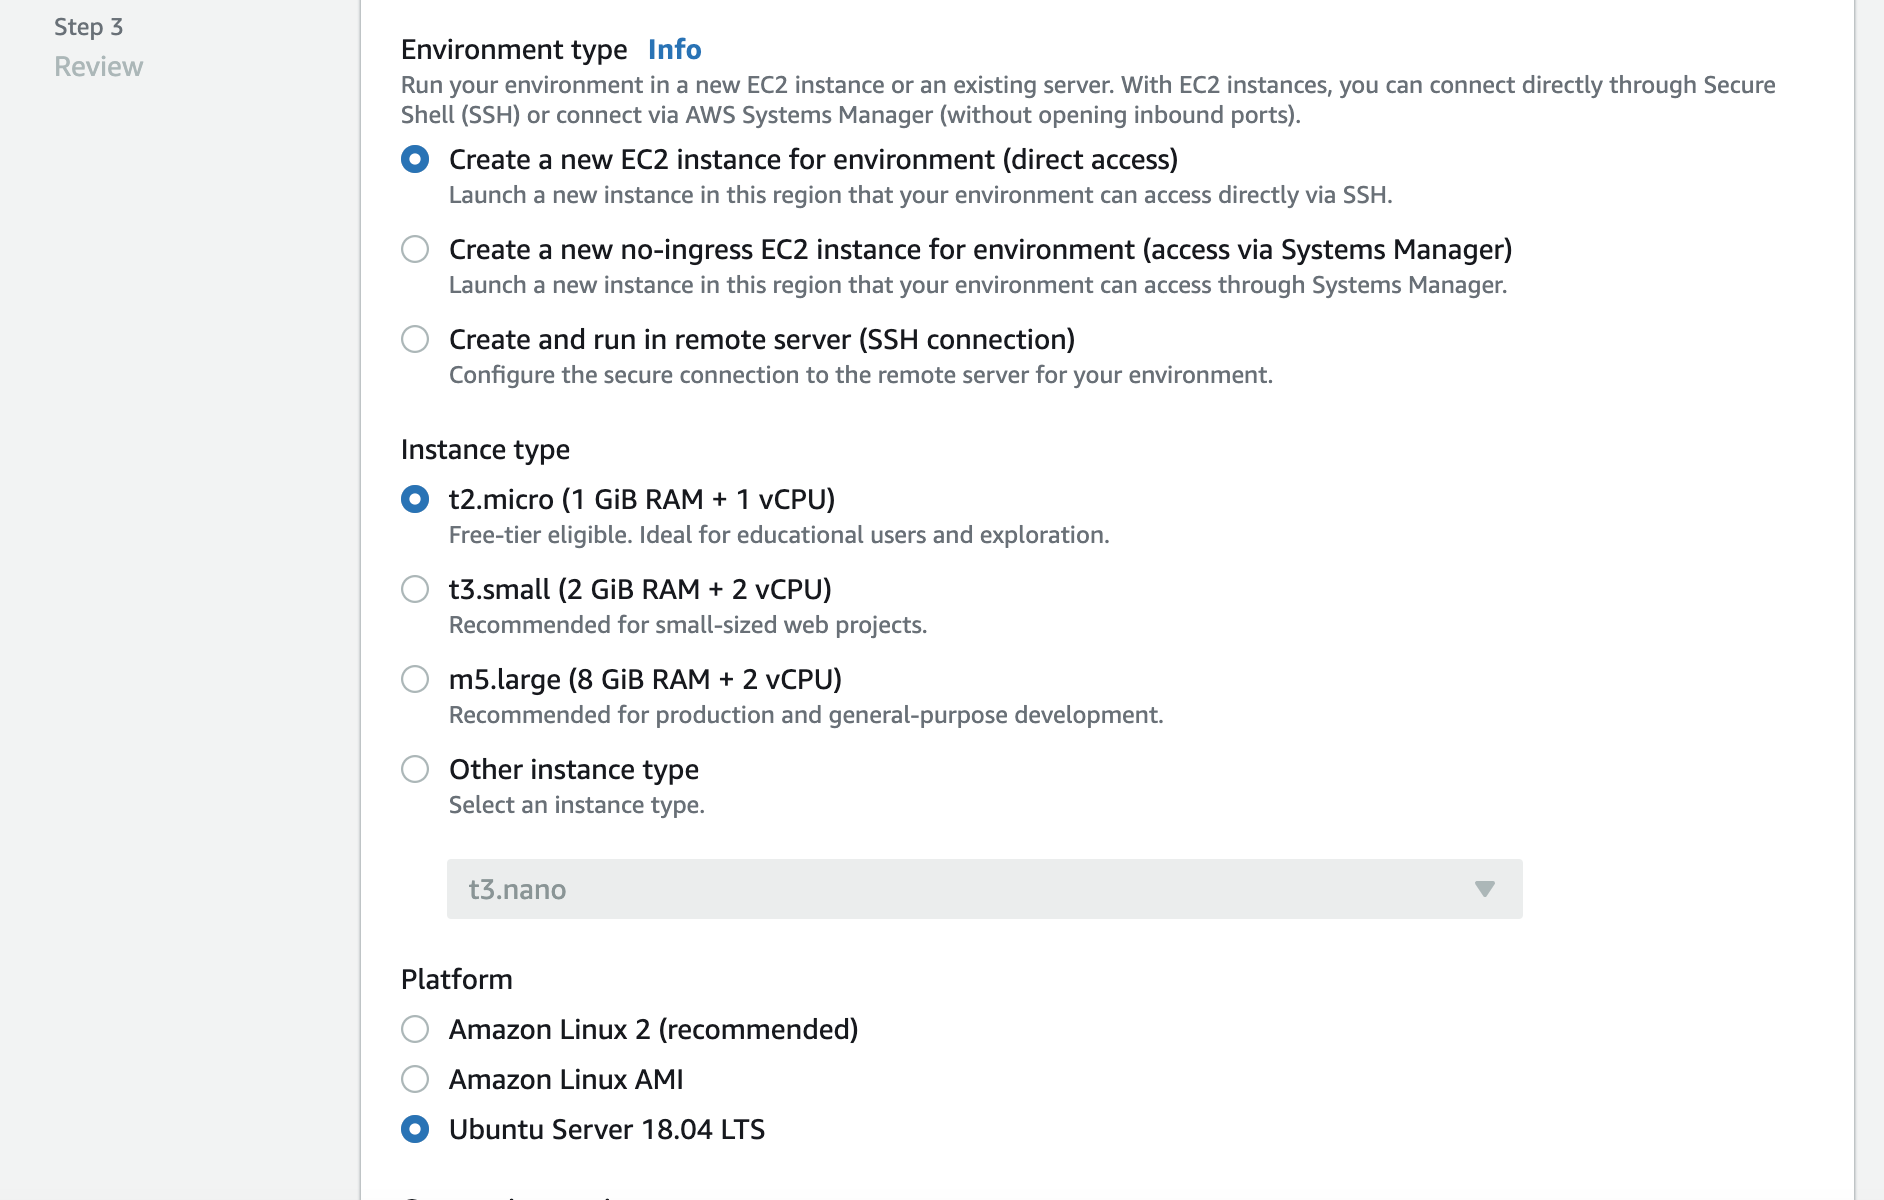
- Proceed with all the remaining steps and create your environment. Creation process may take a few minutes.
Git setup
Next, we need to pull in our code from a code repository. In my case, I'm using GitHub, so my instructions will be more specific towards GitHub.
Clone code repository
AWS Cloud9 EC2 environments come preinstalled with Git. Trying cloning the repository that has your work to this point, you will get permissions issues.
ubuntu:~/environment $ git clone git@github.com:musonza/aws-terraform-by-example.git
Cloning into 'aws-terraform-by-example'...
git@github.com: Permission denied (publickey).
fatal: Could not read from remote repository.

Please make sure you have the correct access rights
and the repository exists.
GitHub setup for ssh access
While in your Cloud9 terminal, run the following commands
- Generate RSA key pair
$ ssh-keygen -t rsa
Hit enter on all steps until you get
ubuntu:~/environment $ ssh-keygen -t rsa
Generating public/private rsa key pair.
Enter file in which to save the key (/home/ubuntu/.ssh/id_rsa):
Enter passphrase (empty for no passphrase):
Enter same passphrase again:
Your identification has been saved in /home/ubuntu/.ssh/id_rsa.
Your public key has been saved in /home/ubuntu/.ssh/id_rsa.pub.
The key fingerprint is: ...
- Copy your Public Key to your GitHub account
In your Cloud9 terminal, run cat /home/ubuntu/.ssh/id_rsa.pub to output the public key. You should see output similar to the following:
ubuntu:~/environment $ cat /home/ubuntu/.ssh/id_rsa.pub
ssh-rsa AAAAB3NzaC1yc2EAAAADAQABAAABAQDRgHEFukDcGGJVoUgaR21u1deG0ujJdar5fp7Kcw4zEOoZCD/VoZpOAB7/VSEF9qpXpqqZIbFBNzbTG92KNF+VKOlzH8CoURlDMCtsUlRH6LVljdUcu6PnStXNsUnVYruVfJLgh1jEK8+jO64OEa9agdZyopH/DWx3DOzIlx2CddYU8Nz..
- Go to your https://github.com/settings/keys page and click New SSH key

- Try cloning the repo again and you should be successful
TIP
Make sure you are cloning via ssh repository URL and not https.
For example git clone git@github.com:musonza/aws-terraform-by-example.git vs git clone https://github.com/musonza/aws-terraform-by-example.git
Terraform init
Cloud9 environment also comes with Terraform preinstalled.
- Run
terraform initcommand since we are starting fresh with the environment
Make sure you are in the root of your cloned project.
ubuntu:~/environment/aws-terraform-by-example (master) $ terraform init

Initializing the backend...

Initializing provider plugins...
- Reusing previous version of hashicorp/archive from the dependency lock file
- Reusing previous version of hashicorp/aws from the dependency lock file
- Installing hashicorp/archive v2.2.0...
- Installed hashicorp/archive v2.2.0 (signed by HashiCorp)
- Installing hashicorp/aws v4.13.0...
- Installed hashicorp/aws v4.13.0 (signed by HashiCorp)

Terraform has been successfully initialized!
- Run
terraform planto check the resources that will be provisioned.
You will get the following error.
ubuntu:~/environment/aws-terraform-by-example (master) $ terraform plan
data.archive_file.zip: Reading...
data.archive_file.zip: Read complete after 0s [id=3709e7b0ae2aafe3ab6e1f48c4de94b36a0bd4a6]
╷
│ Error: error configuring Terraform AWS Provider: failed to get shared config profile, aws-terraform-example
│
│   with provider["registry.terraform.io/hashicorp/aws"],
│   on providers.tf line 10, in provider "aws":
│   10: provider "aws" {
│
╵
ubuntu:~/environment/aws-terraform-by-example (master) $
Remember, on the local machine; we used an AWS credentials profile to enable Terraform to access our AWS resources. However, with Cloud9, we don't need that anymore because the terminal includes sudo privileges to the managed Amazon EC2 instance that hosts our development environment.
Remove profile = "aws-terraform-example" from the aws provider in providers.tf. Your file should look as following:
providers.tf
terraform {
  required_providers {
    aws = {
      source  = "hashicorp/aws"
      version = "~> 4.8"
    }
  }
}

provider "aws" {
  region  = var.aws_region
}
- Running
terraform planshould succeed now.
- Now run
terraform applycommand.
You may get errors similar to
│ Error: failed creating IAM Role (cognito_authenticated): InvalidClientTokenId: The security token included in the request is invalid
│       status code: 403, request id: cce545a5-25ae-4a65-a73f-ae029e1baa4d
│
│   with aws_iam_role.authenticated,
│   on cognito.tf line 9, in resource "aws_iam_role" "authenticated":
│    9: resource "aws_iam_role" "authenticated" {
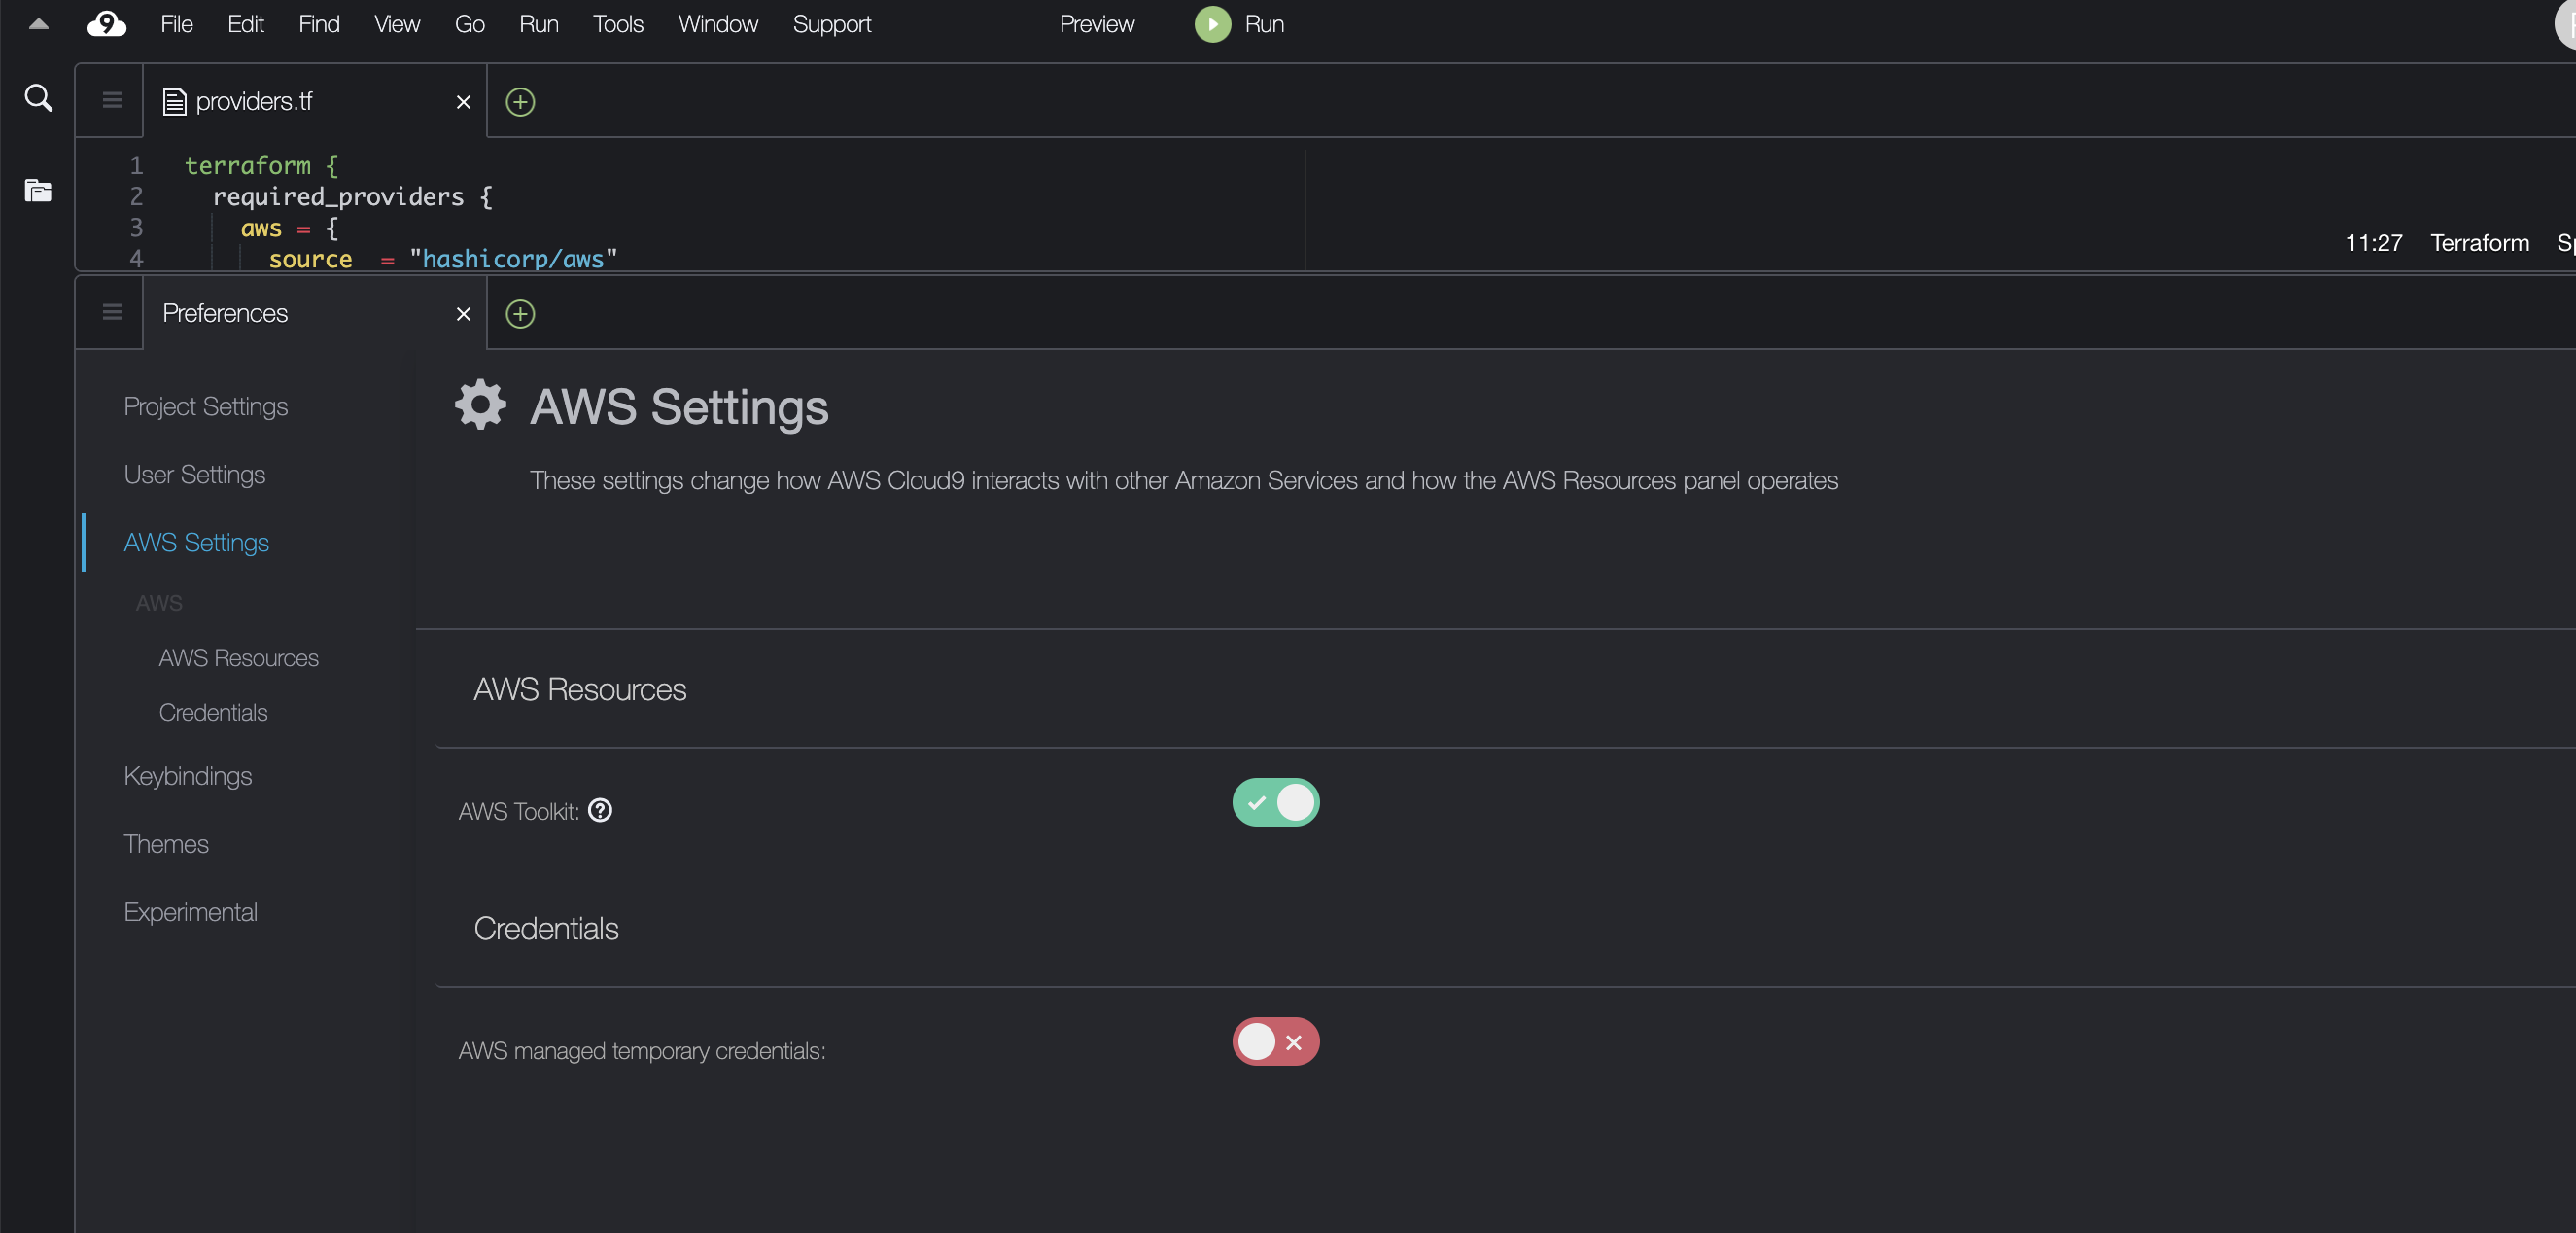
AWS Cloud9 makes temporary AWS access credentials available when we use AWS Cloud9 EC2 development environment. However, you will need to check the Actions supported by AWS managed temporary credentials. In our case of AWS Cloud9 EC2 development environment we have some limitations.
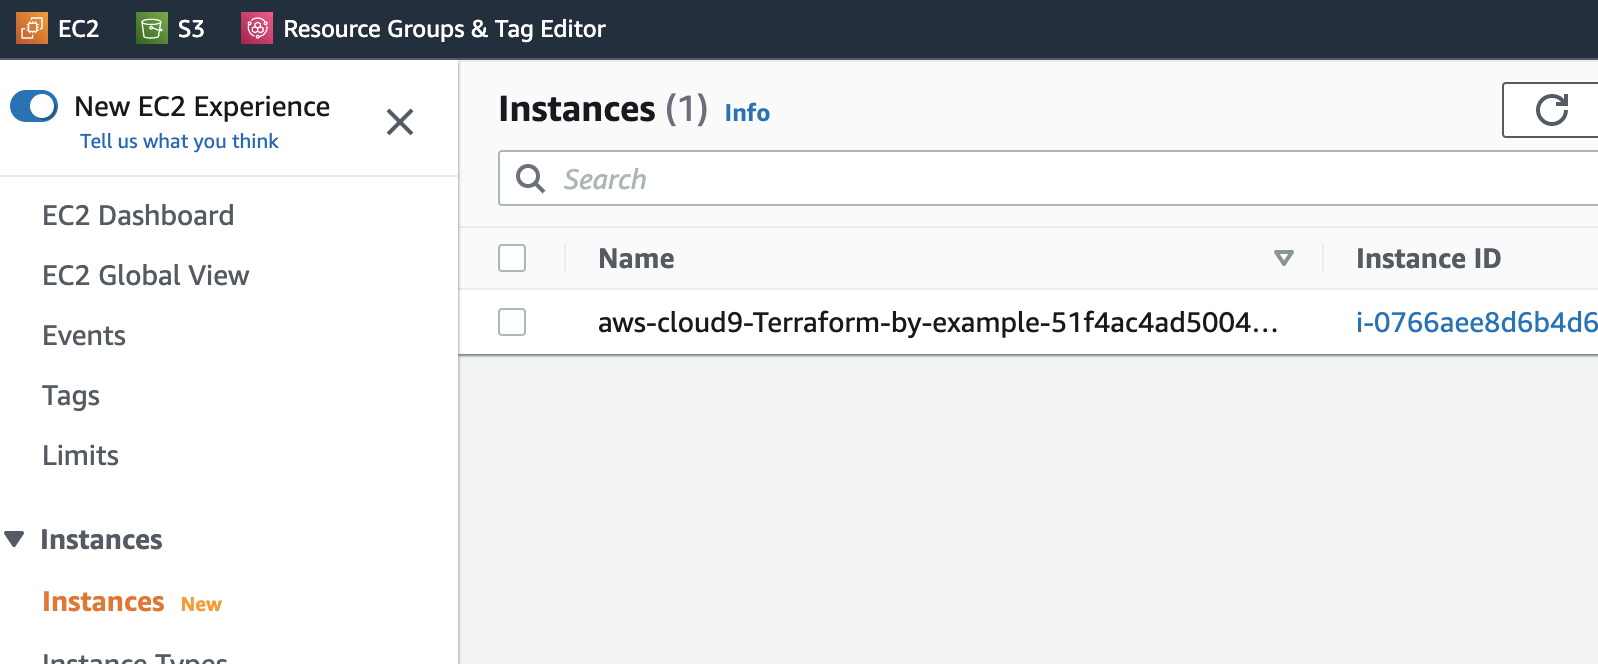
INFO
You can navigate the console's EC2 instances section and you will see an instance that was created for your Cloud9 environment.
Go to Cloud9 -> Preferences -> AWS Settings and turn off AWS managed temporary credentials
Running terraform apply again with throw the following error.
╷
│ Error: error configuring Terraform AWS Provider: no valid credential sources for Terraform AWS Provider found.
│
│ Please see https://registry.terraform.io/providers/hashicorp/aws
│ for more information about providing credentials.
│
│ Error: failed to refresh cached credentials, no EC2 IMDS role found, operation error ec2imds: GetMetadata, http response error StatusCode: 404, request to EC2 IMDS failed
│
│
│   with provider["registry.terraform.io/hashicorp/aws"],
│   on providers.tf line 10, in provider "aws":
│   10: provider "aws" {
│
╵
We get this error because the environment cannot access any AWS services by default if we turn off AWS managed temporary credentials. We need to access AWS services for our Terraform plan to be executed. To address the permission issues, we have the following alternatives:
- Attaching an instance profile to the Amazon EC2 instance that connects to our Cloud9 environment. You can refer to Create and Use an Instance Profile to Manage Temporary Credentials
- Store your permanent AWS access credentials in the environment. This is similar to what we did earlier by running the
aws configurecommand. See Create and store permanent access credentials in an Environment.
Create an instance profile and attach to EC2
We will use the first option - Attaching an instance profile to the Amazon EC2 instance that connects to our Cloud9 environment. We can use the AWS console or AWS CLI to create and attach the instance profile to our Amazon EC2 instance.
Follow the instructions to Create an instance profile with AWS console
Once you have the profile created, you can follow steps to Attach an instance profile to an instance with the Amazon EC2 console
TIP
If you don't find the option Attach/Replace IAM Role in instance settings, look for Actions > Security > Modify IAM role
Run terraform apply again, and after accepting the plan, your resources will be created successfully.